Sewing has been an essential craft for centuries, yet many of the most effective techniques remain hidden from the modern world. Whether you’re a beginner or an expert seamstress, knowing a few ancient sewing secrets can make your work easier, neater, and more durable. Let’s uncover these time-tested tricks that can change the way you sew forever.
The Lost Art of Traditional Sewing Techniques
Sewing is more than just stitching fabric together—it’s an art form that requires precision and patience. Over generations, tailors and seamstresses have developed techniques to make their work more efficient. Unfortunately, many of these methods have been forgotten in the age of fast fashion. Here are some of the best-kept sewing secrets that will enhance your craftsmanship.
1. Strengthen Your Thread with Beeswax
Have you ever had your thread tangle or break while sewing? That’s because raw thread lacks the strength and smoothness needed for seamless stitching. This is where beeswax comes in—a natural way to fortify your thread.
How to Use Beeswax on Thread:
✔ Take a small piece of beeswax (available at craft stores or from natural sources).
✔ Run your thread through the wax, coating it lightly.
✔ Use a warm iron or your fingers to set the wax into the thread, ensuring smoothness.
By waxing your thread, you prevent knots, reduce fraying, and make hand-stitching smoother. This method has been used by tailors for centuries, and it’s still one of the best ways to extend the life of your stitches.
2. Mark Fabrics with Dry Soap for Easy Removal
Fabric markers and chalk can sometimes leave stains or require special erasers, but there’s an easier solution—dry soap. If you’ve never tried this trick before, you’re missing out on one of the simplest, most effective ways to mark fabric.
Why Use Dry Soap Instead of Chalk?
✔ It glides smoothly on fabric, leaving a visible mark.
✔ It washes away completely without leaving a trace.
✔ It’s eco-friendly and doesn’t create dust like chalk.
Simply take an old, dry bar of white soap, sharpen the edges (like a piece of chalk), and use it to mark where you need to cut or stitch. Once your sewing is complete, the soap will dissolve when the fabric is washed—no mess, no stains!
3. The Magic of the Loop Knot Technique
Sick of knots coming undone while sewing? Instead of the usual single or double knots, try the loop knot technique to secure your stitches firmly.
How to Tie a Loop Knot for Sewing:
- Thread your needle and pull the thread through.
- Create a small loop at the end of the thread.
- Pass the needle through the loop and pull tight.
This method keeps your stitches secure without causing bulk or weakening the fabric, making it perfect for delicate materials.
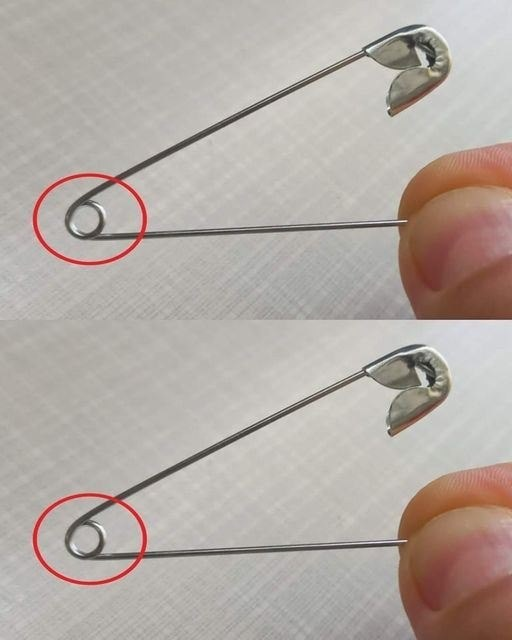
4. Use a Safety Pin to Thread Elastic or Drawstrings
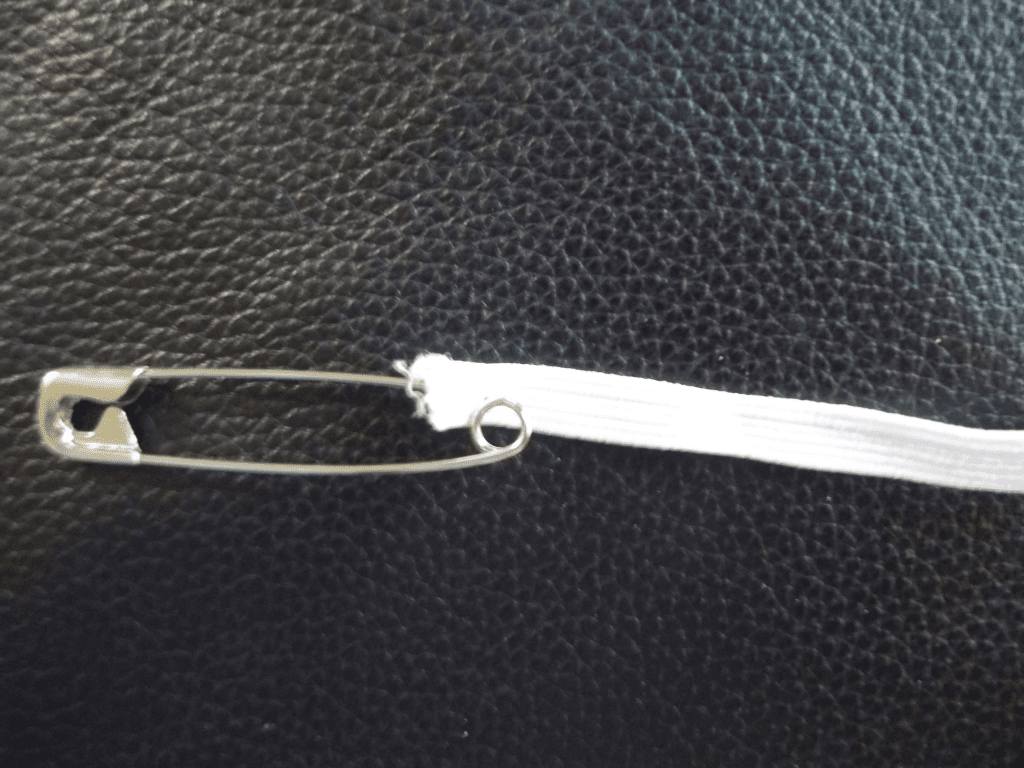
Have you ever struggled to thread elastic through a waistband or a drawstring through a hoodie? Instead of fumbling with your fingers, use a safety pin—a simple yet powerful sewing hack.
How to Thread Elastic with a Safety Pin:
✔ Attach a safety pin to one end of the elastic or string.
✔ Insert the pin into the casing and push it through, guiding it with your fingers.
✔ Once it reaches the other end, pull it out and adjust the elastic.
This old-school trick saves time and frustration, making sewing tasks more manageable.
5. Prevent Frayed Edges with a Simple Hand-Sewn Finish
Fabric edges often fray, leading to unraveling seams and a messy appearance. While overlock machines (sergers) can prevent fraying, they aren’t always accessible. The whipstitch method is a great alternative for hand-sewers.
How to Do a Whipstitch for Fray Prevention:
✔ Thread a needle with strong thread.
✔ Loop the thread around the fabric edge, sewing closely together.
✔ Ensure even spacing for a clean, durable finish.
This technique has been used for centuries, especially in historical garment-making, and remains one of the best ways to keep fabric edges neat and long-lasting.
6. The Basting Stitch: Your Secret to Perfect Seams

Many beginners skip basting stitches because they see them as unnecessary, but professionals know they are a game-changer.
What is a Basting Stitch?
A long, temporary stitch that holds fabric layers together before final sewing. It helps ensure alignment and precision before committing to permanent stitching.
✔ Use long, loose stitches with a contrasting thread.
✔ Check the fit or design before securing the final seam.
✔ Once satisfied, sew the permanent stitches and remove the basting thread.
This method prevents mistakes and gives a more polished, professional finish to your sewing projects.
Bringing Back Time-Tested Sewing Techniques
Sewing may seem simple, but these ancient techniques show that a little extra effort can make a big difference. Whether you’re working on a new garment, a repair, or a creative project, these tricks will elevate your skills and make your work more durable and precise.
So, why not give these methods a try? By incorporating beeswax for thread strength, dry soap for marking, loop knots for security, safety pins for threading, whipstitching for fray control, and basting for precision, you’ll be stitching like a pro in no time.
Conclusion: A Stitch in Time Saves Nine
The beauty of sewing lies in mastering the little tricks that make each stitch stronger and each project more seamless. These ancient sewing secrets have stood the test of time for a reason—they work. So next time you pick up a needle and thread, remember that the simplest solutions are often the most effective.
Ready to take your sewing skills to the next level? Try these techniques, and see the difference for yourself!
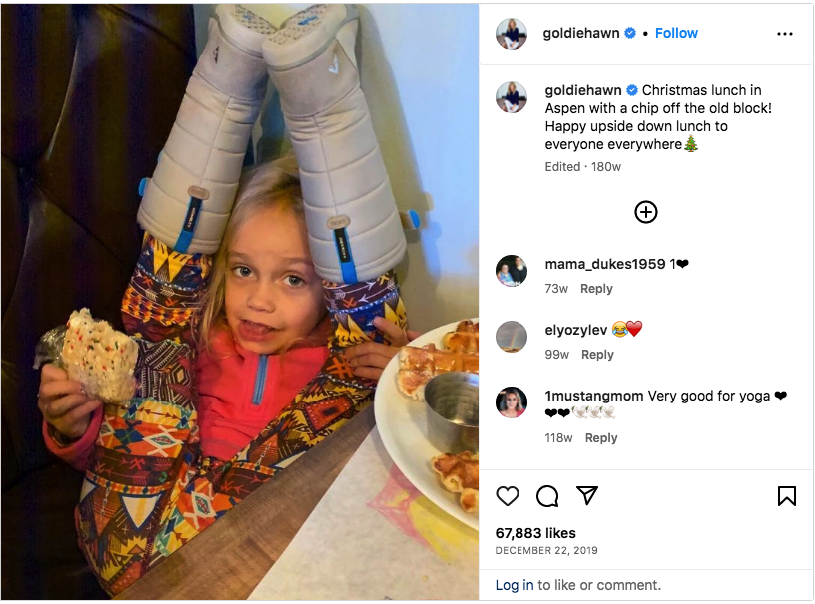
Goldie Hawn’s 7-year-old granddaughter is pretty much a spitting image of her famous grandma
Given that Goldie Hawn is not only ageless but also has a wonderful and endearing relationship with her spouse Kurt Russell and is arguably the most entertaining person in Hollywood, you can’t help but watch her.
She is a devoted mother and grandmother to her three biological children, one stepchild, and six grandchildren, and her social media accounts reflect this.
Hollywood romances don’t usually last very long. Celebrity relationships usually come and go. Goldie Hawn and Kurt Russell, though, are unquestionably an example of how to make it work even after a long marriage.

In 1983, Goldie began dating fellow Hollywood celebrity and the love of her life, Kurt Russell. More than three decades later, the pair is still deeply in love with and adores one another; they don’t even feel the need to be married.

“So as long as my emotional state is in a state of devotion, honesty, caring, and loving, then we’re fine. I like waking up every day and seeing that he is there and knowing that I have a choice. There is really no reason to marry,” Goldie told Woman’s Day in 2007.
Kurt stated, “Everyone has their marker on what is really important and where you draw the line,” in an interview with the Daily Mail in 2018. The kids come first was Goldie and my main principle.

Through the Goldie Hawn Foundation’s MindUp initiative, which she founded in 2003 to assist improve settings for kids so they may succeed in school and in life, Goldie puts the needs of all children first.
Every time you see her with her daughter Kate Hudson, a Hollywood star in her own right, you can tell how much she loves her own kids. With her second husband Bill Hudson, Goldie had a daughter named Kate and her older brother Oliver.
The amusing mother-daughter team recently made an appearance on the Ellen show, where Goldie made fun of how close she was to daughter Kate when she gave birth to Rani Rose Hudson Fujikawa, who is now one year old.
“The doctor was in there and I could see the head and then it disappeared,” Goldie animatedly declared on the show. “And I’m looking over his shoulder, then the doctor turned to me and said ‘Goldie if you get any closer you’re gonna fall in.’”
In addition, Kate has two sons: Ryder Russell, 15, and Bingham Hawn Bellamy, 8.


Leave a Reply